
How To Bed A Rifle Stock In Eight Easy Steps [Expert Says]
Have you ever noticed how the point of impact of your shots get all over the place while you fire your rifle? Well, you might need a stock bedding, and this post is here to help!
Your rifle’s accuracy depends on several factors, including the stability and fitting of the metalwork to the stock. Bedding is a coating of epoxy resin around the stock to separate it from the barrel and absorb shock.
Each time you fire your rifle, the barrel moves upward and creates a pulling action on the stock, resulting in a violent jolt. Without proper bedding, this can cause your stock and barrel to collide with each other, changing the direction of your shot.
Not only does proper bedding make your shots more accurate and consistent, but it also prolongs the life of the stock by protecting it from deformation, friction, or stress due to the impact of recoil from firing. It allows your rifle to achieve its best grouping and stay zeroed.
While you can pay somebody to bed your rifle stock, you can save time and money by doing it on your own. So, here’s how to bed a rifle stock in just a few easy steps!
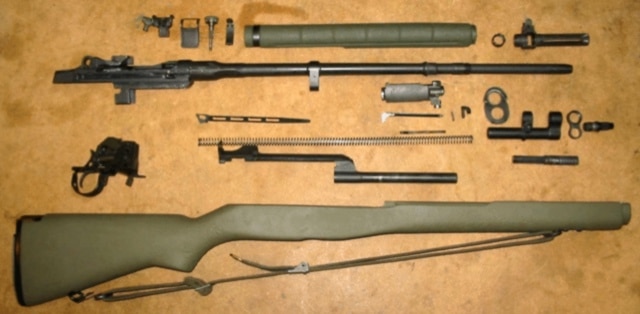
What You’ll Need to Follow this Tutorial
Before anything else, the first thing you should do is gather the following materials:
● Rifle.
● A slow but hard-drying epoxy that does not expand or shrink after hardening.
● Release agent.
This type of lubricant usually comes with some types of epoxies. However, shoe polish ( read review best ems boots, if you want to find the best boots for hunting or if you’re looking for waterproof boots that will do a great job ), aerosol spray, car wax, or cooking spray can also be used.
● Long action bolts (remove the heads).
● Screwdriver.
● Latex Gloves.
● Modeling Clay.
● Electrical tape or Masking Tape.
● Stock Inletting tools.
● Sandpaper.
● Barrel vise, stock vise, or any suitable holding fixture.
● Razor blade.
● Cleaner/ degreaser or denatured alcohol.
● Dry rags.
● Old newspaper.
● Cotton Swabs or cotton balls.
Step-by-Step Instructions
Step 1. Dry fitting the stock and other connecting parts
Fit all the parts of your rifle together, including the stock, action, magazine box, trigger, bolt, and bolt release. You can also put dummy shells in the magazine to see if the action feeds appropriately.
Never try to force the pieces to fit properly. If anything does not seem to sit correctly, contact the gun’s manufacturer to purchase a new one. If you’re a novice and unfamiliar with the rifle, take a picture of the assembled firearm to serve as your reference later.
Step 2. Disassembling the Gun
Enhance your shooting experience with a properly bedded rifle stock.
Before you prepare your gun for bedding, disassemble it first and take a look at the previous bedding job, if any. Remove the action from the stock and all the small parts including the trigger and magazine. If not removed, the trigger assembly can be destroyed if any bedding material seeps into it.
Observe how and where the epoxy was applied. If the previous bedding appears to be in good condition, feel free to follow the same method. However, if it is worn, cracked, or has softened, find an alternative bedding method.
Step 3. Prepare your work area
Before you start, cover your whole working surface or area with old newspapers. Use vise grips to elevate the stock and hold it in place. You can also use this time to put on rubber gloves.
Step 4. Preparing the rifle
To prepare your rifle for bedding, you should first degrease the action to make it a good surface for materials to adhere to. Saturate a cotton swab or ball with a degreaser or some denatured alcohol. Use this to wipe the recoil lug and action.
Once you have degreased the recoil lug, place some electrical tape or masking tape over and around the recoil lug to create a small gap and ensure the easy release of the action from the stock. Wrap two layers of tape over its top, bottom, front, back, and sides.
Then, apply some release agent to all the metal parts, including the footplate, action screws, and every other part to be reinserted into the stock. When using aerosol or cooking spray, apply it liberally to coat the action and barrel. For wax, use your finger (with gloves on) to spread the wax. To be sure, cover everything with your release agent of choice and allow it to dry and set.
Applying too little release agent can cause the bedding to adhere to the metal and ruin it.
Step 5. Filling in the gaps
Next, you have to fill every hole, ridge, crevice, nook, and cranny of the action with some modeling clay. Use masking tape over and around protrusions. This will prevent the epoxy from getting into and setting in places it should not.
When bedding material hardens in holes or around protrusions, the action becomes fixed to the stock, called mechanical locking. If this happens, separating the two parts can damage or destroy one or both.
Use your fingers to push and shape the clay to fill the holes and a razor blade to eliminate excess clay. In letting tools can also be used.
Once you’ve done that, reapply a second coating of the release agent and degrease the stock’s interior. Dip a cotton ball or swab in denatured alcohol to wipe down the stock.
Step 6. Bedding the rifle
Prepare the bedding compound or epoxy in a non-waxed container. Avoid whipping the mixture to prevent bubble formation. Always follow the package instructions. You can also add some dye to match the stock’s color.
Then, apply a thin and even coating on the rear screw and recoil lug areas. You can also use the former bedding job as your guide. Do not apply bedding material on the action’s upper part or where the bottom is wider than the top.
Place the action in the stock and use a screwdriver to tighten the screws, starting from the rear screw. Place a vise around the barrel and let the bedding material or epoxy to cure. Inserting the barrel into the vise will decrease the stress on the stock.
Since screwing the action into the stock squeezes the epoxy, use a cotton swab, a razor blade, and a piece of sandpaper to over the surface and scrape off the excess residue.
Step 7. Curing and Cleaning
Allow the bedding material to cure and set for 24 to 48 hours, depending on the product’s curing instructions.
After curing, disassemble the rifle by unscrewing the action from the stock. Then, use tools for popping the action out. An exact mold of the action should be left in the store.
Then, use in letting tools to remove the bedding material from the stock’s pillar holes. Use them to remove all of the modeling clay as well. Then, soak a rag in hot water run it over the parts to remove the release agent.
Step 8. Reassembling the rifle
Next, reassemble your firearm using the reference picture you took previously. Tighten the screws and allow a week to pass for the compound to completely cure before using the rifle.
Conclusion:
Congratulations! You now know how to to bed a rifle and why you need to do it. Sure, the task seems daunting and complicated, but with the proper tools and information, you can do it on your own and save money.
I hope you learned something new from this article. If so, please leave a comment below! Questions and suggestions are welcome, too! If you liked this post, I will surely appreciate it if you share it with your friends and family!
Find Out The best choke for trap reviews
Read also: Why a Flashlight Should Be Used When Hunting
What All To Know Before Buying An Assault Rifle
References:
https://www.wikihow.com/Bed-a-Rifle-Stock
https://en.wikipedia.org/wiki/Rifle_bedding
https://www.ballisticstudies.com/Knowledgebase/What+is+rifle+bedding.html
https://rifleshooter.com/2014/09/rifle-bedding-how-to-bed-a-match-rifle/
Ben Casnocha is an accomplished hunting writer whose passion for the outdoors and wildlife has driven his literary pursuits. With a deep-rooted connection to nature and a keen understanding of the hunting world, Casnocha brings a unique perspective to his writing, blending his experiences in the wilderness with insightful observations.